How to Email Sales Forms in QuickBooks Desktop?
- mariahernandaz58
- Dec 16, 2020
- 3 min read
Learn how to email sales forms in QuickBooks Desktop:
If you are in search of a process to send sales forms to the customers via email on the QuickBooks desktop, then this is where your search ends. Whether you are sending one invoice to many customers or many invoices to a single customer, it is possible by emailing sales forms in QuickBooks desktop. The user need not send forms one by one on ready the QuickBooks desktop. The software can hold the forms till the user is read to send them all at once. The user can also save time and print or email multiple sales forms as a batch, with the help of the steps discussed later in this article. Thus, make sure that you read this post carefully till the end.
Steps to save forms in QuickBooks desktop
The user can save the forms by carrying out the below steps:
1. For the sales and purchasing forms
· The user will have to mark the email later checkbox on the main tab at the top of the form
· And then, simply save the form
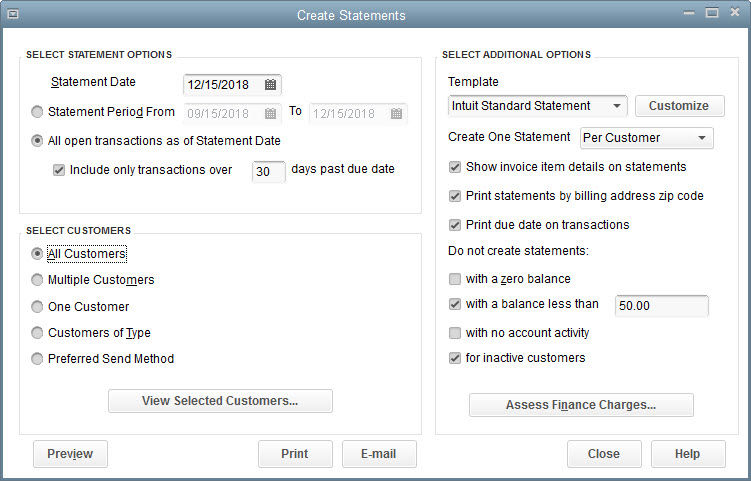
2. Whereas for statements
· The user will have to move to the customer's menu and then choose to create statements
· After that, select the appropriate option under the select customer’s tab
· Followed by, opting for the email option and send later option respectivelyon
Sending forms by batch in QuickBooks desktop
The user can also send forms by batch, by simply carrying out a couple of steps:
At first, the user will have to move to the File the menu and choose send forms option

After that, select all the forms
And hit send now tab
The user can edit or remove an email from the list, at the time of selecting forms to send window
Steps to editing an email in QuickBooks
To edit an email:
Firstly, select the correct email and click on the edit email option
After that, edit the email as per the requirements in the email text box. And then, the QuickBooks will save changes automatically.
Steps to remove an email in QuickBooks desktop
Talking about removing an email, it should be noted that this only deletes the email. QuickBooks doesn’t delete the form itself.
For this, the user will first have to checkmark the email to be removed
And then, click on the remove and yes tabs respectively
How to send many forms to a single user?
Before you start, it should be noted that the steps mentioned below for sending many forms to a single user are only for the 2020 QuickBooks release. Now, let us check out the steps:
Initially, the user will have to move to the File menu and then choose the send forms option
After that, with the help of the checkbox, the user will have to select all the forms that are to be sent
Now, the user will have to select the checkbox for combine forms to a recipient in one email

And also, select the send now tab
It should be noted that this feature will only work for the files without a paid subscription.
How to email or print sales forms now?
This can be done by simply carrying out a handful of steps, which includes:
The user will have to choose the sales menu and also the all sales tab initially
After that, it is important to select the checkboxes for the transactions to be emailed or printed. The user can also choose from the filter drop-down menu
And then, opt for the batch actions and click on print transactions or send transactions.
Emailing or printing multiple sales forms later
In case the user wishes to email or print forms later on, then he/she is required to mark them, as it would make it easy to spot. The steps to be followed here are:
1. The user should first mark sales forms to email or print later
By selecting send later to email it later (if option available)
And select print or preview and then print later to print it afterward
2. The user will then have to select save and close the transaction
3. Now, filter to batch print or email
Once you have marked the forms, you have to filter your sales list by:
Firstly, selecting the sales menu and also all the sales tab
a. After that, choosing the filter drop down menu
b. Once done with that, choose either send later or print later and then click on apply
c. Lastly, click on all the checkboxes for the transactions to be emailed or printed.
Conclusion!
We conclude the article over here and believe that the above steps might help you in emailing the sales forms to the QuickBooks desktop. However, if you have any query or for any sort of further technical assistance, you can simply get in touch with our QuickBooks technical support team right away.
We are a team of certified accounting professionals, who work round the clock to provide the best possible support services instantly.


Comments